For every YouTube content creator who makes it big, there are hundreds of other equally talented people who fail. It’s not because of lack of talent or ideas that they don’t make it. It’s just that they don’t know the fundamentals of how to create videos for YouTube.
There’s a difference between creating videos and creating YouTube videos that actually work. If you’re a beginner or a content creator who’s yet to find that big moment, here’s your crash course on YouTube videos.
This guide to creating YouTube videos is based on the experience of highly successful content creators who routinely churn out successful videos. This step-by-step manual for YouTube is based on the learnings of editors who regularly work with successful video makers.
In other words, this step-by-step YouTube guide is from those who know what it takes.
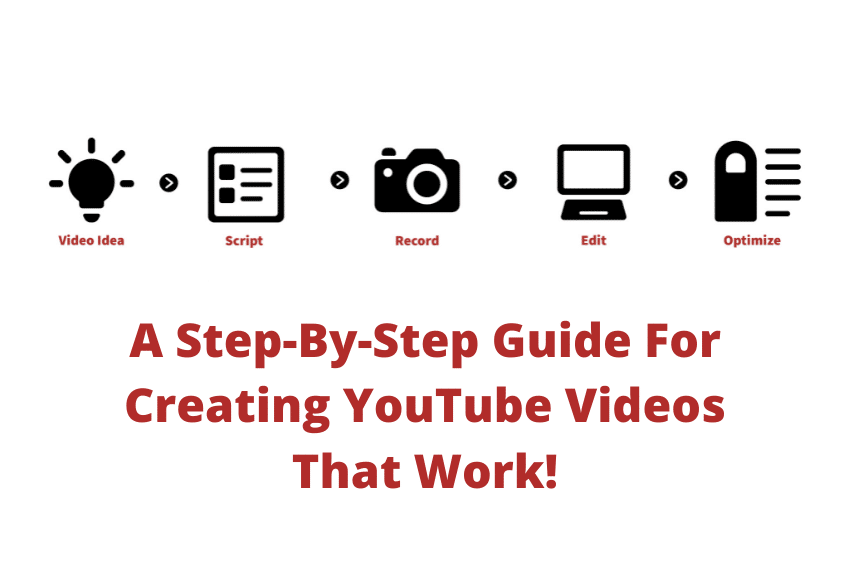
The only step-by-step YouTube guide you’ll ever need
The first thing you’ve got to understand is that it’s a well-defined process that you have to follow every time you want to create videos. You should diligently follow the method and shouldn’t change the order of things.
While going through your social media timeline, you might come across a short video on camera angles or visual effects. This might make you wonder, “I should try that in my next video.”
Well, you could. But that’s not the reason to make a YouTube video and importantly, that shouldn’t be the first step. You may note down or save something interesting you see but shouldn’t believe that your video will stand out because of that.
For that, you need a process that begins with identifying the central theme.
Step 1: Finding a subject
Discover your passion (and work on it)
You need a concept for not just your videos but your YouTube presence. Everything starts with that.
You have to figure out a subject that you’re deeply passionate about. Remember we said subject and not an idea. The difference is that your subject should be big enough to generate several ideas.It could be anything under the sun (or even beyond the solar system for that matter). What’s important is that you’re not just interested in it or have something unique to share but that you’re willing to learn more about it.
Mere interest won’t cut it. There are a hundred other content creators who’re equally passionate about Italian food or West African music. The question is, can you spend hours every week learning more about the topic?
Have you read enough books or seen documentaries on the subject? Do you follow the category experts on social media? Do you subscribe to magazines that focus on your area?
That’s how you define your interest in the topic. You’re passionate and working hard to know more about it.
Develop a distinct take
The next step is to find a unique take on the idea. In-depth knowledge isn’t how you gain traction on YouTube. There are videos on pretty much all subjects on the platform. What you need is a slightly different rendition of your subject.You don’t have to spend weeks figuring out a distinct approach. It could be how you phrase it, shift the narrative, or change the point of view. You could also do it by shifting genres. You could take a serious subject and have a humorous take on it.
If your subject is small towns in America, a unique take could be “Ten small towns in America that don’t even have cops.” Instead of giving a bland title like “Ten really small towns in America,” now you have an interesting approach that others would be interested in.
If your topic is strange foreign words, instead of going with the usual “Words that mean love in 10 languages” or “Words without English translation,” you could try “Foreign words that best describe 2021.” Or “10 German words you can text your ex.”
What you’re doing is developing a different view of the familiar. That’s how you show your mastery over a topic and the creativity to have an interesting view of it.
Generate a list
The next step is to think of as many videos as possible on your topic. Anyone can come up with one or two but you need to develop a content calendar for months. So, brainstorm until you have a list of videos that you can create in your subject area.
You can expand your subject if you find it limiting. In fact, this is the best way to test if your topic can be worthwhile to explore. It’s also helpful to remember that your subject shouldn’t be too limiting. It should be easy to generate ideas around it.
“Nautical warfare from the 17th century” may sound interesting but it would be difficult to create multiple videos around it. Even if you do create a list of ideas, remember that you should have either videos, illustrations, or sketches to support you.
Define your target audience
Everyone who watches YouTube isn’t your target audience. You need to be specific because that’s what will help you create relevant content. This will also help you partner with brands later. For advertisers, the primary focus is your audience. If it’s too varied, you’re not being specific enough.
You can segment your audience using multiple filters. These include language, nationality, education, interests, profession, skill sets, affiliation (to sports clubs or organizations), etc. You shouldn’t refine it too much or you will end up with a narrow subset. What you want is a group with certain demonstrable and identifiable traits.
So, “working women” is too broad an audience. “Working women between the ages of 40 and 45 who live in the suburbs” is a better segmentation.Remember that while your subject will lead to your target audience, it can also work the other way around. Your audience may help you identify your subject.
If your audience is college-educated working men between the ages of 25 and 35, you could find your niche around things that interest them. “What you didn’t know about caffeine and libido” could come out of that segmentation.
Allow your topic to find your audience and vice versa.
Step 2: Scripting
If you’ve ever wondered how to create videos for YouTube, the place you should focus on is your script (link to the article). This is the most important part of creating videos and sadly, the most overlooked.
Most people believe that “putting it together” is all it matters. They believe that scripts are for short films and not YouTube videos. These are the same individuals who come up with uninspiring, incoherent, and unsuccessful videos. They are also the same people who’re forced to give up on their YouTube ambitions too soon.
Your script will determine the quality of your video. If you don’t get it right, nothing else will matter. Even the best editing techniques and special effects won’t be able to save a mediocre script.Like everything else about creating videos, you need to approach it methodically. So, once you have your subject, idea, and target audience, you need to work on your script. That begins by understanding the components.
Hook
The hook is what’s unique about your video. This is your script summed up in a line or two. It’s the essence and the central idea of the story. This is what will decide whether your script and the eventual video will turn out to be interesting.
You should begin scripting by writing your hook. It should be short, simple, and easy to understand. If you have difficulty writing it in a line or two, your final script will also be complicated.
Intro
Think of your favorite films and you’d know that the first few minutes did the trick. This is true irrespective of the genre. For YouTube videos, the intro – the first scene or lines in the script – will introduce the topic and what’s unique about it. If the intro isn’t engrossing enough, your audience will leave.
The intro will set the tone, tempo, and mood for the video. You only have a few seconds to captivate your audience’s attention. Your video could be brilliant, unique, and engaging but if the intro is boring, people will skip your video.The intro is also your opportunity to welcome your audience, introduce yourself, your channel, and what you do. This is your chance to establish your brand identity. For greater resonance and effect, keep the opening – the first phrase – same for all your scripts. Repetition will make it familiar.
Be creative to develop your brand. This is how you become the “that weird guy into backyard compost” or “the violin girl who’ll put you to sleep.”
Outro
This is how you end the script. An outro on YouTube videos has three objectives. The first goal is to sum up the content in a short way without repeating what you said earlier.
The second is to encourage viewers to see more videos from you by subscribing to your channel or enabling notifications. That will depend on your content and presentation and whether it was informative or engaging.
The third objective is to remind people of your brand identity. Like with the intro, mention your name, the channel’s name, and what you do. Tell them what they can expect in future videos. Be pleasant, and thank them for their time.Script
Now that you have the outline and structure, it’s time to write your script. Remember that your script should tell a story. This is true whether you’re talking about commercial vacuum cleaners or the importance of vitamin D.
The second thing you should keep in mind is to speak the language of your audience. The last thing anyone wants to see is a patronizing expert. Be relatable and be one with your viewers.
Thirdly, keep it short and to the point. A page on your script will roughly translate to a minute of video. Don’t repeat yourself or needlessly explain things. Only write what’s absolutely necessary.
The next point is perhaps the most overlooked aspect of YouTube video scripts. Think visual. Most content creators think in terms of words and end up with videos that are verbose and boring. A video is a visual medium and you need to emphasize the visuals first.Remember the golden rule: Show, don’t tell.
Once you finish your first draft, read it slowly and check it for timing, and clarity. If any word or phrase sounds a bit complicated to you, it will sound a lot complicated to your viewer. Rewrite until you get a draft that’s short, simple, and engaging.
Step 3: Recording
A vital part of the guide to creating YouTube videos is recording (insert link here). You have three options to record. You can record through a webcam, mobile camera, or using professional equipment.
Webcam
Most laptops and computers come with inbuilt webcams. If yours doesn’t have one or you need a camera with better resolution, your options start from $20. You can record via your webcam and directly upload it to YouTube. To do this, you should go to the upload button on YouTube and then click on Webcam capture and then click on Record.
Mobile camera
The advantage of using your smartphone is that you can take it anywhere to record. You can also edit and directly upload to your YouTube channel. If you’re using a mobile camera, it may take some effort to get used to the lighting, ambient sounds, and voice recording.
Professional equipment
Here’s something all successful content creators on YouTube know: To be a professional, you need professional help.
You can either wait for your channel to become popular to use professional equipment or use it to differentiate yourself from others. But why do you need it? You need it because you’ll get a high-definition camera, appropriate lighting, tripods, microphones, etc. which you may not be able to arrange on your own.
You can either rent it to your place or hire a studio. If it’s a studio, remember that you’ll be limited by fewer choices on backgrounds. But the recording will be crisp, the lighting will feel polished and your final output will look professional.
Best practices for recording
There are several things to know if you’re setting up your home studio. To start with, ensure that there’s adequate lighting. Also, make sure that there are no ambient sounds to distract you. Remember, something as simple as a siren in the middle of your narration will feel amateurish.
Practice several times before the recording. Ask a friend or colleague for feedback before you start recording.
Importantly, relax before the shoot begins. Take a few deep breaths and be comfortable. if you’re sitting, make sure that the chair is at a comfortable height. Talk slowly and clearly. Focus on clarity rather than style.
Also, don’t repeat the same gestures as it will make you look uncomfortable. Keep an open body language. Don’t slouch. Keep your back straight.
Step 4: Editing
If you decide to edit your videos, the good news is that YouTube has an inbuilt video editor called YouTube Studio. Most cameras also have basic editing software. The bad news is that it may be confusing for the inexperienced.
YouTube Studio and other software help you trim the beginning and the end, adjust lighting, and add an end screen. You can also cut scenes from the middle. With a few hours of practice, you should be able to edit a good quality version of your video.
If you handle the editing, your focus should be to keep it simple. Just because you find so many tools on the software doesn’t mean you have to try them all out. You don’t have to add unnecessary effects or transitions. Do what’s relevant to the topic and what will help you build a brand.
But all these will take a lot of your time. If there’s one thing successful video channel creators know, it’s that you should focus on the important aspects. You should be looking for ideas on content, polishing your script, analyzing competitors, and engaging with your audience.The more time you spend on editing, the less time you’ll have for these tasks that will determine your success. That’s why most content creators outsource their editing to professionals. With professional help from Vidchops, for example, you get experienced editors who would’ve worked with other content creators on YouTube.
You’d also be able to develop a visual language that’s uniquely yours. This will reinforce your brand identity and allow your followers to easily recognize you on search results. You won’t have to reach out to amateur editors or outsource it through online platforms to people with not enough experience or expertise.
Step 5: Optimizing
Most people who search for how to create videos for YouTube don’t pay enough attention to one of its crucial parts; optimizing for various platforms. They will run into this problem when it’s time to upload and then they will have to create various versions of the same video at the last minute.
Of course, it will cost them both time and resources.
This is what you have to understand about social media platforms. They love native videos. In other words, videos uploaded with their specific dimensions. LinkedIn, Instagram, and Facebook have different aspect ratios which you need to keep in mind when exporting your videos.With an expert editor like Vidchops, you’ll get videos optimized for different platforms. The videos will be repurposed, saving you the effort of having to find the original, change the dimensions, and export in high resolution.
You‘ll get different versions of the same final video suited to the requirements of YouTube, LinkedIn, Instagram, Facebook, and Twitter. All you need to do is upload.
In short
This is the age of content creators. Specifically, this is the age of content creators who specialize in video. But you need to approach it like a professional to succeed. If you learn how to create videos for YouTube in a structured manner, you’re distancing yourself from the amateurs. That’s the first and most important step you can make in your life as a content creator.