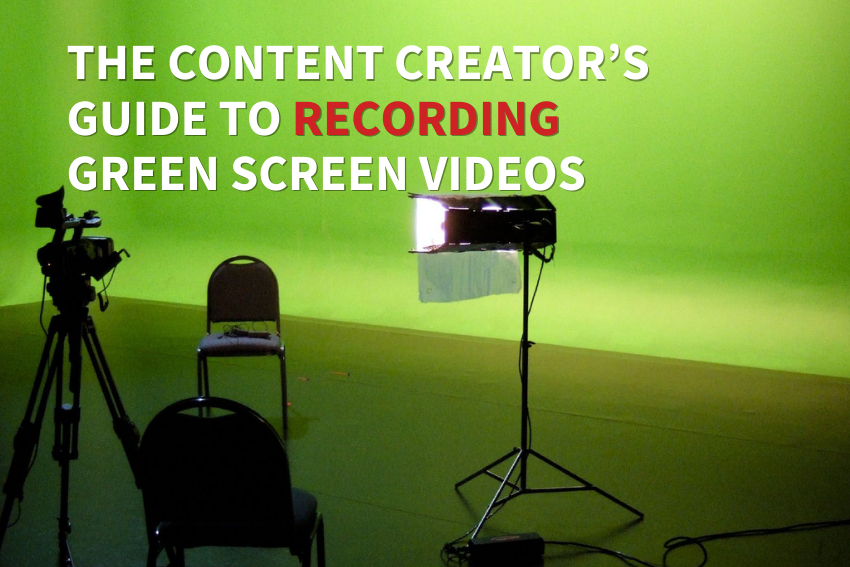
There comes a time in the life of every content creator, when they feel the urge to get in front of a blank green screen and start pretending to be somewhere else.
Pulling out the green screen for the first time is a milestone step. It opens the door to unending creative possibilities and marks entry into a select class of video creatives.
Have you reached that point in your creative journey? Let us be the first to congratulate you and offer some points of advice. There are a ton of fun times ahead. But that only comes after taking care of a few preliminary technicalities.
Setting your green screen up right is the only way to get consistently good footage. Luckily, that isn’t as complicated as it used to be and can be done in 7 simple-ish steps. Here’s what that looks like.
1 – Get a Green Screen
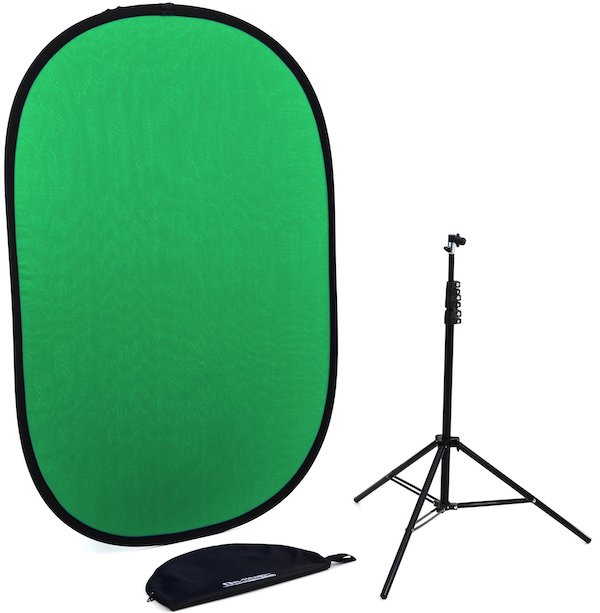
Green screens come in various sizes. So, the first thing to do is to measure your intended filming location. Then decide whether or not you want a permanent green screen installation or one that can be quickly put away.
If you will be filming in a multipurpose space, look for a screen that’s collapsible and portable. If you have a dedicated filming space and are absolutely fine with having a permanent green screen, you can also check out screens that come with a stand.
At this point, it’s probably cheaper to buy a green screen than to DIY things. You can buy a brand new one for as little as $10 to $20. These can often be found on second-hand marketplaces as well. The better ones cost around $150 to $200, and up.
That said, price isn’t the only factor to consider. Make sure you get a screen that’s stable, easy to set up, and fits your filming needs.
The cheapest green screens are perfect for getting started but will be a little flimsier and might have you wasting time trying smooth out wrinkles.
The more expensive models are built to last and can often be taken on location outside. The screens are thick, opaque, and stretch into place without a wrinkle in sight.
2 – Setup the Screen
Set the green screen up in the background of your recording area. The typical filming area should be contained within its framing.
A green screen should ideally have at least 3 to 15 feet of space in front of it. You need enough space to stand with a bit of a gap and place your camera and lighting equipment.
However, a foot or two is fine for streamers and other content creators.
3 – Position the Subject
Figure out where the recording subject – that means you – will stand or sit. It isn’t great to be right in front of a green screen since that colored light can bounce off the screen and onto you. This is called “green spill.”
Positioning yourself 3 to 15 feet away from the screen is best.
4 – Get the Lighting Right
You need to light at least two separate zones when using a green screen: the screen itself and the person being recorded. The lighting should be bright, even, and diffused.
A simple green-screen lighting setup has two lights pointing at the green screen from opposing sides with a slightly overhead light pointing where you will be. This basic triangular setup is fine for beginners.
Make sure to have the lights positioned correctly and the green screen evenly lit. If it isn’t, it will look patchy and shadowy on camera.
Your main lighting options are:
- umbrella lights
- LED light panels
- softbox lighting
- or ring lights
Video lighting kits are available starting from around $50 but there are no guarantees on how well those work. It’s more reasonable to expect to pay around $200 for a decent entry-level lighting kit. The professional gear costs well into the thousands.
Green screen lighting can get super technical. But you can get started fairly quickly with three lights set up in a triangular formation.
5 – Use the Decent Camera
Cameras used to record green screen footage should capture at least 720p HD with a frame rate of at least 24 frames per second. But that’s a minimum standard only.
Investing in a higher-quality camera will pay off with better footage. Now is as good a time as any to upgrade your gear.
Here’s what you might want to look for:
- 4K Ultra HD shooting up to 30 or 60 frames per second
- 1080p HD shooting up to 120 frames per second
- High ISO feature for use in low light
- Low field of depth
6 – Position the Camera
Now decide where you will keep the camera. You can do this before or after setting up the lights, but it’s a little easier to move one camera around.
Position the camera so that it only captures within the green screen. And make sure it doesn’t capture any of the lighting equipment.
The camera has to be super-still when recording against a green screen background. Any movement will make it look like you – or anything else being filmed – are bouncing, shrinking, vibrating, or growing against the background.
Secure the camera in place with a decent tripod.
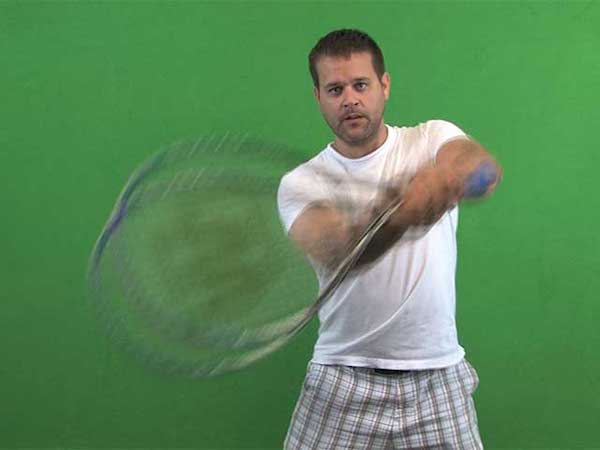
7 – Beware of Green Screen Motion Blur
Is your green screen, lighting, and camera all set up? Perfect. You’re finally ready to start filming.
But first, it might be time to sharpen up those video recording skills. That’s because green screening presents the risk of something called motion blur.
Motion blur happens when objects in motion begin to blur into the green background when the camera is unable to properly track them.
You’re likely to run into this issue at one point or another unless every video is shot in near-perfect stillness. Even frizzy hair or flyaway strands can create motion blur.
Motion blur can be cleaned up to some degree in editing. But if this is happening, you need to shoot the videos at a higher shutter speed.
A higher shutter speed can make the footage look jerky, but those side effects can be corrected in editing. This is one reason why you may need to upgrade your camera before incorporating green screen footage.
Are you already using green screen footage and running into this problem? We can help with that. Book a call with one of our client consultants and let’s talk about it.
A Few More Tips for Green Screen Success
- Never wear anything green on camera.
- Use a blue screen if you have green eyes, like wearing green, or want to shoot footage with plants or green objects.
- Position yourself at least 4 to 6 feet away from the green screen.
- Use a lower F-Stop number aperture. Opening up the camera lens like this will make the depth of field shallower. That, in turn, will soften and blend out the background green screen.
- User a low ISO setting to avoid noise artifacts – or speckles and spots in the background.
- If you find yourself accidentally leaving the green screen borders, try marking the boundaries with some tape.
Recording Versus Editing Green Screen Videos
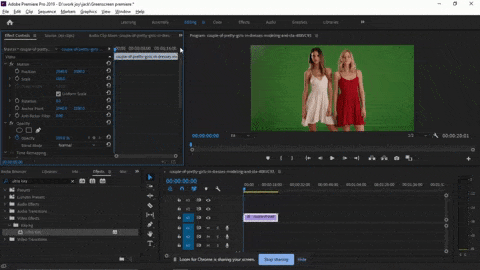
That’s everything you need to get started recording green screen videos. But that doesn’t turn a green screen into your desired background.
The green screen is just a colored prop that can technically be made of any other color. The real process is all about the editing.
The real term for what we typically refer to as green screening is chroma key compositing or chroma keying. It’s the technique of filming in front of a green screen, then switching the green screen out for another background.
This is done through chroma key compositing software that works by removing footage that matches a certain color.
The software first has to be “keyed” to recognize the green screen’s color. It will then make any footage with that color appear translucent. That includes the backdrop and anything else, including the people being filmed. (This is why green-eyed video creators should use blue background screens.)
Chroma keying tools make this process way easier than it used to be. At least if you want to stick to a static background. But anything beyond that takes a lot of editing work to pull off. You have to match the video footage correctly, adjust the colors, tidy up any errant green spill, correct blur, make things cinematic, and the list goes on.
This takes you way outside the creative role and into a more technical, tedious space. If you’re a serious content creator, it’s probably time to stop worrying about stuff like that.
Are you a video creative or a technical editor?
We happen to think your time is better spent on making awesome videos. That’s why our video editing subscriptions include royalty-free stock video footage and the option of adding your own.
Try a plan out and see how much easier it is. We have a 1 to 2-day turnaround with an initial 14-day money-back guarantee period. Book a call with one of our consultants to get yourself started.